今日の写経19
今日の写経
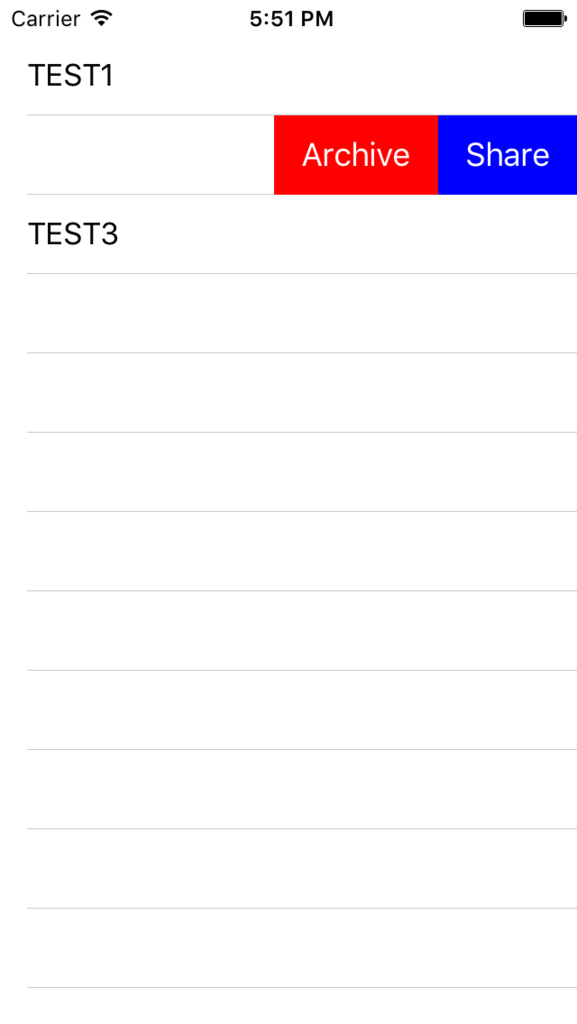
045. TableViewのボタンの拡張 - Swift Docs
所感
1ヶ月ぶり、書くのが減ってきたのでアプリを作り始めようと思う。
今回でSwiftが2.0に上がっているのでvarの変数宣言とprintlnで怒られた。
画面キャプチャ

ソースコード
// ViewController.swift
import UIKit

class ViewController: UIViewController, UITableViewDelegate, UITableViewDataSource {

    // tableで使用する配列
    var myItems: [String] = ["TEST1", "TEST2", "TEST3"]
    var myTableView: UITableView = UITableView()

    override func viewDidLoad() {
        super.viewDidLoad()

        // Status Barの高さを取得
        let barHeight: CGFloat = UIApplication.sharedApplication().statusBarFrame.size.height

        // Viewの高さを幅を取得
        let displayWidth: CGFloat = self.view.frame.width
        let displayHeight: CGFloat = self.view.frame.height

        // TableViewの生成(status barの高さ分ズラして表示)
        myTableView.frame = CGRect(x: 0, y: barHeight, width: displayWidth, height: displayHeight - barHeight)

        // Cellの登録
        myTableView.registerClass(UITableViewCell.self, forCellReuseIdentifier: "MyCell")

        // DataSourceの設定
        myTableView.dataSource = self

        // Delegateを設定
        myTableView.delegate = self

        // Viewに追加する
        self.view.addSubview(myTableView)
    }

    override func didReceiveMemoryWarning() {
        super.didReceiveMemoryWarning()
    }

    /*
    Cellが選択された際に呼び出される
    */
    func tableView(tableView: UITableView, didSelectRowAtIndexPath indexPath: NSIndexPath) {
        print("Num: \(indexPath.row)")
        print("Value: \(myItems[indexPath.row])")
    }

    /*
    Cellの総数を返す
    */
    func tableView(tableView: UITableView, numberOfRowsInSection section: Int) -> Int {
        print("numberOfRowsInSection")
        return myItems.count
    }

    /*
    Editableの状態にする
    */
    func tableView(tableView: UITableView, canEditRowAtIndexPath indexPath: NSIndexPath) -> Bool {
        print("canEditRowAtIndexpath")
        return true
    }

    /*
    特定の行のボタン操作を有効にする
    */
    func tableView(tableView: UITableView, commitEditingStyle editingStyle: UITableViewCellEditingStyle, forRowAtIndexPath indexPath: NSIndexPath) {
        print("commitEdittingStyle:\(editingStyle)")
    }

    /*
    Cellに値を設定する
    */
    func tableView(tableView: UITableView, cellForRowAtIndexPath indexPath: NSIndexPath) -> UITableViewCell {
        print("cellForRowAtIndexPath")

        let cell: UITableViewCell = tableView.dequeueReusableCellWithIdentifier("MyCell", forIndexPath: indexPath) as UITableViewCell

        cell.textLabel?.text = "\(myItems[indexPath.row])"
        return cell
    }

    /*
    Butonを拡張する
    */
    func tableView(tableView: UITableView, editActionsForRowAtIndexPath indexPath: NSIndexPath) -> [UITableViewRowAction]? {

        // Shareボタン
        let myShareButton: UITableViewRowAction = UITableViewRowAction(style: .Normal, title: "Share") { (action, index) -> Void in
            tableView.editing = false
            print("share")
        }
        myShareButton.backgroundColor = UIColor.blueColor()

        // Archiveボタン
        let myArchiveButton: UITableViewRowAction = UITableViewRowAction(style: .Normal, title: "Archive") { (action, index) -> Void in
            tableView.editing = false
            print("archive")
        }
        myArchiveButton.backgroundColor = UIColor.redColor()

        return [myShareButton, myArchiveButton]
    }

}
今日の写経18
今日の写経
048. プルンプルンするButtonの作成 - Swift Docs
所感
1週間ぶりぐらいのswift書いたけど、特に問題ない。Bool書くのが少しメンドイ。 時間のあるときにやるか、時間を極力見つける
画面キャプチャ

ソースコード
// ViewController.swift
import UIKit

class ViewController: UIViewController {

    // ボタン
    var myButton: UIButton!

    override func viewDidLoad() {
        super.viewDidLoad()

        // ボタンを作成する
        myButton = UIButton()
        myButton.frame = CGRectMake(0, 0, 100, 100)
        myButton.backgroundColor = UIColor.greenColor()
        myButton.layer.masksToBounds = true
        myButton.setTitle("ボタン", forState: UIControlState.Normal)
        myButton.setTitleColor(UIColor.whiteColor(), forState: UIControlState.Normal)
        myButton.layer.cornerRadius = 50.0
        myButton.layer.position = CGPoint(x: self.view.frame.width/2, y: self.view.frame.height/2)

        // TouchDownの時のイベントを追加する
        myButton.addTarget(self, action: "onDownButton:", forControlEvents: .TouchDown)

        // TouchUpの時のイベントを追加する
        myButton.addTarget(self, action: "onUpButton:", forControlEvents: .TouchUpInside | .TouchUpOutside)

        // 背景色を黒にする
        self.view.backgroundColor = UIColor.blackColor()

        // ボタンをViewに追加する
        self.view.addSubview(myButton)
    }

    /*
    ボタンイベント(Down)
    */
    func onDownButton(sender: UIButton){
        UIView.animateWithDuration(0.06,
            animations:{ () -> Void in
                self.myButton.transform = CGAffineTransformMakeScale(0.9, 0.9)
            })
            { (Bool) -> Void in
        }
    }

    /*
    ボタンイベント(Up)
    */
    func onUpButton(sender: UIButton){
        UIView.animateWithDuration(0.1,
            animations: { () -> Void in
                self.myButton.transform = CGAffineTransformMakeScale(0.4, 0.4)
                self.myButton.transform = CGAffineTransformMakeScale(1.0, 1.0)
            })
            { (Bool) -> Void in
        }

    }
    override func didReceiveMemoryWarning() {
        super.didReceiveMemoryWarning()
        // Dispose of any resources that can be recreated.
    }


}
今日の写経17
今日の写経
046 UITableViewをSlideさせる - Swift Docs
所感
タイピングミスがいくつかあった。
- TableViewと比較するのにItemsと比較した。(119行目くらい)
- フッターにバーを置きたかったのに、frameの高さを取得しないで幅を取得していた。(61行目くらい)
viewDidLoadとdidReceiveMemoryWarningを今回はコメントアウトしたけど、理由は知らんので調べる。
画面キャプチャ


ソースコード
// ViewController.swift
import UIKit

class ViewController: UIViewController, UIScrollViewDelegate, UITableViewDelegate, UITableViewDataSource {

    // UIPage Control.
    var pageControl: UIPageControl!
    // UIScrollView
    var scrollView: UIScrollView!
    // TableViewのアイテム
    let myItems: [[String]] = [["TEST1", "TEST2", "TEST3"], ["App1", "App2", "App3", "App4", "App5"]]
    // TableViewに表示するタイトル
    let myTitles: [String] = ["title0", "title1"]
    // TableView
    var myTableView: [UITableView] = []
    // ページ番号
    let pageSize = 2

    override func viewDidLoad() {
//        super.viewDidLoad()
        // ScrollViewの設定
        let width = self.view.frame.maxX, height = self.view.frame.maxY
        scrollView = UIScrollView(frame: self.view.frame)
        scrollView.showsHorizontalScrollIndicator = false
        scrollView.showsVerticalScrollIndicator = false
        scrollView.pagingEnabled = true
        scrollView.delegate = self
        scrollView.contentSize = CGSizeMake(CGFloat(pageSize) * width, 0)
        self.view.addSubview(scrollView)

        // Status Barの高さを取得
        let barHeight: CGFloat = UIApplication.sharedApplication().statusBarFrame.size.height

        // Viewの高さと幅を取得
        let displayWidth: CGFloat = self.view.frame.width
        let displayHeight: CGFloat = self.view.frame.height

        // TableViewの生成( status barの高さ分ずらして表示)
        for var i = 0; i < pageSize; i++ {
            let tableView: UITableView = UITableView(frame: CGRect(x: CGFloat(i) * width, y: barHeight, width: displayWidth, height: displayHeight - barHeight))
            myTableView.append(tableView)
            myTableView[i].registerClass(UITableViewCell.self, forCellReuseIdentifier: "MyCell")
            myTableView[i].dataSource = self
            myTableView[i].delegate = self
            scrollView.addSubview(myTableView[i])

            // ページごとに異なるラベルを表示
            let myLabel:UILabel = UILabel(frame: CGRectMake(CGFloat(i) * width + width/2 - 40, height/2 - 40, 80, 80))

            myLabel.backgroundColor = UIColor.blackColor()
            myLabel.textColor = UIColor.whiteColor()
            myLabel.textAlignment = NSTextAlignment.Center
            myLabel.layer.masksToBounds = true
            myLabel.text = "Page\(i)"
            myLabel.font = UIFont.systemFontOfSize(UIFont.smallSystemFontSize())
            myLabel.layer.cornerRadius = 40.0

            scrollView.addSubview(myLabel)
        }

        // PageControlを作成
        pageControl = UIPageControl(frame: CGRectMake(0, self.view.frame.maxY - 50, width, 50))
        pageControl.backgroundColor = UIColor.lightGrayColor()

        // PageControlするページ数を設定
        pageControl.numberOfPages = pageSize

        // 現在ページを設定
        pageControl.currentPage = 0
        pageControl.userInteractionEnabled = false

        self.view.addSubview(pageControl)
    }

    func scrollViewDidEndDecelerating(scrollView: UIScrollView) {
        if fmod(scrollView.contentOffset.x, scrollView.frame.maxX) == 0 {
            // ページの場所を切り替える
            pageControl.currentPage = Int(scrollView.contentOffset.x / scrollView.frame.maxX)
        }
    }

    /*
    Cellが選択された際に呼び出される
    */
    func tableView(tableView: UITableView, didSelectRowAtIndexPath indexPath: NSIndexPath) {
        if tableView == myTableView[0] {
            println("Num: \(indexPath.row)")
            println("value: \(myItems[0][indexPath.row])")
        } else if tableView == myTableView[1] {
            println("Num: \(indexPath.row)")
            println("Value: \(myItems[1][indexPath.row])")
        }
    }

    /*
    Cellの総数を返す
    */
    func tableView(tableView: UITableView, numberOfRowsInSection section: Int) -> Int {
        if tableView == myTableView[0] {
            return myItems[0].count
        } else if tableView == myTableView[1] {
            return myItems[1].count
        } else {
            return 0
        }
    }

    /*
    Headerを追加
    */
    func tableView(tableView: UITableView, viewForHeaderInSection section: Int) -> UIView? {
        let myLabel: UILabel = UILabel(frame: CGRect(x: 0, y: 0, width: self.view.bounds.width, height: 100))

        myLabel.textAlignment = .Center

        if tableView == myTableView[0] {
            myLabel.backgroundColor = UIColor.blackColor()
            myLabel.textColor = UIColor.whiteColor()
            myLabel.text = myTitles[0]
        } else if tableView == myTableView[1] {
            myLabel.backgroundColor = UIColor.blueColor()
            myLabel.textColor = UIColor.whiteColor()
            myLabel.text = myTitles[1]
        }
        return myLabel
    }

    /*
    Headerの高さ
    */
    func tableView(tableView: UITableView, heightForHeaderInSection section: Int) -> CGFloat {
        return 50.0
    }

    /*
    Cellに値を設定する
    */
    func tableView(tableView: UITableView, cellForRowAtIndexPath indexPath: NSIndexPath) -> UITableViewCell {
        var cell:UITableViewCell = tableView.dequeueReusableCellWithIdentifier("MyCell", forIndexPath: indexPath) as! UITableViewCell

        if tableView == myTableView[0] {
            cell.textLabel?.text = "\(myItems[0][indexPath.row])"
        } else if tableView == myTableView[1] {
            cell.textLabel?.text = "\(myItems[1][indexPath.row])"
        }
        return cell
    }
//    override func didReceiveMemoryWarning() {
//        super.didReceiveMemoryWarning()
//        // Dispose of any resources that can be recreated.
//    }


}
今日の写経16
今日の写経
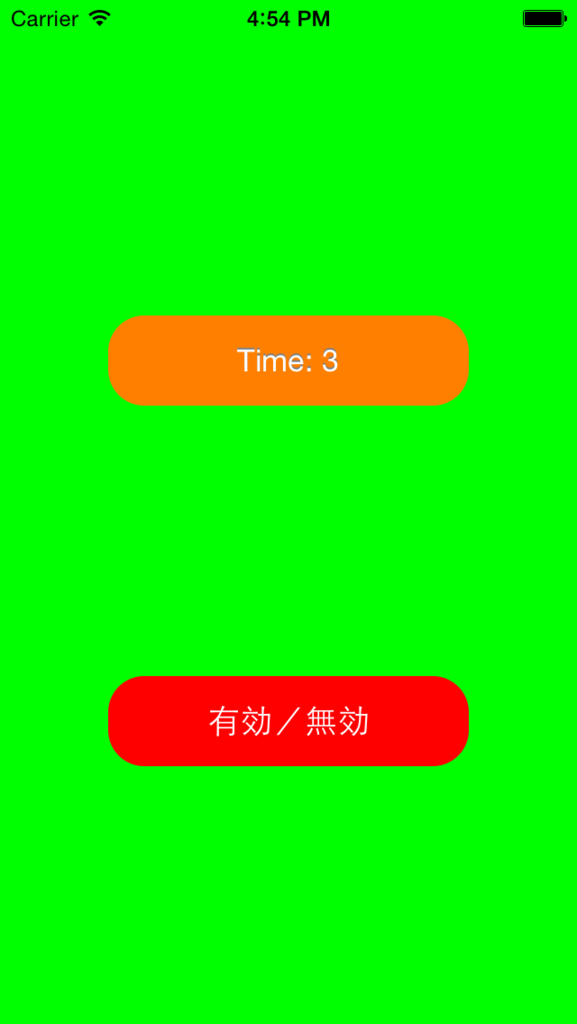
037 タッチイベントの有効/無効を切り替える - Swift Docs
所感
もしかすると初のif文を書いたかもしれないことに気づく。
ちょっとロジックが入ってるのを写経続けていきたい。
画面キャプチャ


ソースコード
// ViewController.swift
import UIKit

class ViewController: UIViewController {

    private var cnt : Float = 0
    private var myLabel : UILabel!
    private var ButtonCnt: Int = 0
    private var TimerMergin: Float = 0
    private var ignoreBegineTime: Float = 0

    override func viewDidLoad() {
        super.viewDidLoad()

        // 背景を青色に設定
        self.view.backgroundColor = UIColor.cyanColor()

        // UiButtonを作る
        let myButton: UIButton = UIButton()
        myButton.frame = CGRectMake(0, 0, 200, 50)
        myButton.layer.cornerRadius = 20.0
        myButton.layer.position = CGPointMake(self.view.frame.width/2, 400)
        myButton.backgroundColor = UIColor.redColor()
        myButton.setTitle("有効/無効", forState: .Normal)
        myButton.addTarget(self, action: "onClickMyButton:", forControlEvents: .TouchUpInside)

        // タイマー用ラベルを作る
        myLabel = UILabel(frame: CGRectMake(0, 0, 200, 50))
        myLabel.backgroundColor = UIColor.orangeColor()
        myLabel.layer.masksToBounds = true
        myLabel.layer.cornerRadius = 20.0
        myLabel.text = "Time: \(Int(cnt))"
        myLabel.textColor = UIColor.whiteColor()
        myLabel.shadowColor = UIColor.grayColor()
        myLabel.textAlignment = NSTextAlignment.Center
        myLabel.layer.position = CGPoint(x: self.view.bounds.width/2, y: 200)
        self.view.backgroundColor = UIColor.cyanColor()

        // viewにラベルボタンを追加
        self.view.addSubview(myLabel)
        self.view.addSubview(myButton)
    }

    override func didReceiveMemoryWarning() {
        super.didReceiveMemoryWarning()
    }

    // NSTimerIntervalで指定された秒数ごとに呼び出されるメソッド
    internal func onUpdate(timer : NSTimer){

        cnt += 0.1

        // 桁数を指定して文字列を作る
        let str = "Time: \(Int(cnt))"
        myLabel.text = str

        // 現在のタイマー時間から向こうが始まった時間の差
        TimerMergin = cnt - ignoreBegineTime

        // タッチイベントが無効のとき
        if UIApplication.sharedApplication().isIgnoringInteractionEvents() {

            // 無効になってから5秒経った時
            if Int(TimerMergin) == 5 {

                println("タッチイベントが無効です")
                self.view.backgroundColor = UIColor.cyanColor()

                // タッチイベントを有効にする
                UIApplication.sharedApplication().endIgnoringInteractionEvents()
                println("タッチイベントを有効にしました")
            }
        }
    }

    internal func onClickMyButton(sender: UIButton) {
        // ボタンを押した回数
        ButtonCnt += 1

        // タッチイベントが有効のとき
        if UIApplication.sharedApplication().isIgnoringInteractionEvents() == false {

            println("タッチイベントが有効です")
            self.view.backgroundColor = UIColor.greenColor()

            // タッチイベントを無効にする
            UIApplication.sharedApplication().beginIgnoringInteractionEvents()
            // 無効が始まった時間を取得
            ignoreBegineTime = cnt

            println("タッチイベントを無効にしました")
            println("5秒後に有効になります")

            // 最初にボタンを押したときだけタイマーを作る
            if ButtonCnt == 1 {

                // タイマーを作る
                // 更新のインターバル(0.1秒)
                NSTimer.scheduledTimerWithTimeInterval(0.1, target: self, selector: "onUpdate:", userInfo: nil, repeats: true)
            }
        }
    }
}
今日の写経15
今日の写経
016 UIScrollViewの表示 - Swift Docs
所感
特になし。 面白いコードでもない。
画面キャプチャ

ソースコード
// ViewController.swift
import UIKit

class ViewController: UIViewController {

    private var myScrollView: UIScrollView!

    override func viewDidLoad() {
        super.viewDidLoad()

        // ScrollViewを生成
        myScrollView  = UIScrollView()

        // ScrollViewの大きさを設定する
        myScrollView.frame = CGRectMake(0, 0, self.view.frame.size.width, self.view.frame.size.height)

        // UIImageに画像を設定する
        let myImage = UIImage(named: "temple.jpg")!

        // UIImageViewを生成する
        let myImageView = UIImageView()

        // myImageViewのImageにImageを設定する
        myImageView.image = myImage

        // frameの値を設定する
        myImageView.frame = CGRectMake(0, 0, myImage.size.width, myImage.size.height)

        // ScrollViewにmyImageViewを追加する
        myScrollView.addSubview(myImageView)

        // ScrollViewにcontentSizeを設定する
        myScrollView.contentSize = CGSizeMake(myImageView.frame.size.width, myImageView.frame.size.height)

        // ViewにScrllViewをAddする
        self.view.addSubview(myScrollView)
    }

    override func didReceiveMemoryWarning() {
        super.didReceiveMemoryWarning()
        // Dispose of any resources that can be recreated.
    }


}
今日の写経14
今日の写経
015 UIViewControllerで画面遷移する - Swift Docs
所感
特になし。 面白いコードでもない。
画面キャプチャ


ソースコード
// AppDelegate.swift
import UIKit

@UIApplicationMain
class AppDelegate: UIResponder, UIApplicationDelegate {

    private var window: UIWindow?


    func application(application: UIApplication, didFinishLaunchingWithOptions launchOptions: [NSObject: AnyObject]?) -> Bool {

        // ViewControllerを生成する
        let myFirstViewController: FirstViewController = FirstViewController()

        // UIWindowを生成する
        self.window = UIWindow(frame: UIScreen.mainScreen().bounds)

        // rootCiewControllerにNatigationControllerを設定する
        self.window?.rootViewController = myFirstViewController
        self.window?.makeKeyAndVisible()

        return true
    }

    func applicationWillResignActive(application: UIApplication) {
        // Sent when the application is about to move from active to inactive state. This can occur for certain types of temporary interruptions (such as an incoming phone call or SMS message) or when the user quits the application and it begins the transition to the background state.
        // Use this method to pause ongoing tasks, disable timers, and throttle down OpenGL ES frame rates. Games should use this method to pause the game.
    }

    func applicationDidEnterBackground(application: UIApplication) {
        // Use this method to release shared resources, save user data, invalidate timers, and store enough application state information to restore your application to its current state in case it is terminated later.
        // If your application supports background execution, this method is called instead of applicationWillTerminate: when the user quits.
    }

    func applicationWillEnterForeground(application: UIApplication) {
        // Called as part of the transition from the background to the inactive state; here you can undo many of the changes made on entering the background.
    }

    func applicationDidBecomeActive(application: UIApplication) {
        // Restart any tasks that were paused (or not yet started) while the application was inactive. If the application was previously in the background, optionally refresh the user interface.
    }

    func applicationWillTerminate(application: UIApplication) {
        // Called when the application is about to terminate. Save data if appropriate. See also applicationDidEnterBackground:.
    }
}
// FirstVireController.swift
import UIKit

class FirstViewController: UIViewController {

    override func viewDidLoad() {
        super.viewDidLoad()

        // 背景色をGreenに設定する
        self.view.backgroundColor = UIColor.greenColor()

        // ボタンを生成する
        let nextButton: UIButton = UIButton(frame: CGRectMake(0, 0, 120, 50))
        nextButton.backgroundColor = UIColor.redColor()
        nextButton.layer.masksToBounds = true
        nextButton.setTitle("Next", forState: .Normal)
        nextButton.layer.cornerRadius = 20.0
        nextButton.layer.position = CGPoint(x: self.view.bounds.width/2, y: self.view.bounds.height - 50)
        nextButton.addTarget(self, action: "onClickMyButton:", forControlEvents: .TouchUpInside)

        // ボタンを追加する
        self.view.addSubview(nextButton)
    }

    /*
    ボタンイベント
    */
    internal func onClickMyButton(sender: UIButton) {
        // 遷移するViewを定義する
        let mySecondViewController: UIViewController = SecondViewController()

        // アニメーションを設定する
        mySecondViewController.modalTransitionStyle = UIModalTransitionStyle.PartialCurl

        // Viewの移動
        self.presentViewController(mySecondViewController, animated: true, completion: nil)
    }

    override func didReceiveMemoryWarning() {
        super.didReceiveMemoryWarning()
        // Dispose of any resources that can be recreated.
    }

}
// SecondViewController.swift
import UIKit

class SecondViewController: UIViewController {

    override func viewDidLoad() {
        super.viewDidLoad()

        // 背景色を設定
        self.view.backgroundColor = UIColor.blueColor()

        // ボタンを作成
        let backButton: UIButton = UIButton(frame: CGRectMake(0, 0, 120, 50))
        backButton.backgroundColor = UIColor.redColor()
        backButton.layer.masksToBounds = true
        backButton.setTitle("Back", forState: .Normal)
        backButton.layer.cornerRadius = 20.0
        backButton.layer.position = CGPoint(x: self.view.bounds.width/2, y: self.view.bounds.height - 50)
        backButton.addTarget(self, action: "onClickMyButton:", forControlEvents: .TouchUpInside)
        self.view.addSubview(backButton)
    }

    /*
    ボタンイベント
    */
    internal func onClickMyButton(sender: UIButton) {
        // 遷移するViewを定義
        let myViewController: UIViewController = FirstViewController()

        //アニメーションを設定
        myViewController.modalTransitionStyle = UIModalTransitionStyle.FlipHorizontal

        // viewの移動
        self.presentViewController(myViewController, animated: true, completion: nil)
    }
    override func didReceiveMemoryWarning() {
        super.didReceiveMemoryWarning()
        // Dispose of any resources that can be recreated.
    }

}
今日の写経13
今日の写経
014 UIImageViewの画像の回転/拡縮/反転 - Swift Docs
所感
特になし。 何が出来るのかを知っていく訓練のような気がしている。
画面キャプチャ

ソースコード
// ViewController.swift
import UIKit

class ViewController: UIViewController {

    override func viewDidLoad() {
        super.viewDidLoad()

        // 画像を設定する。
        let myImage: UIImage = UIImage(named: "icon2.jpg")!

        // 画像を縮小する。
        let myScaleDownView: UIImageView = UIImageView(frame: CGRect(x: 100, y: 30, width: 80, height: 80))

        // UIImageViewに画像を設定する
        myScaleDownView.image = myImage

        // 縮小用(0.5倍)のアフィン行列を生成
        myScaleDownView.transform = CGAffineTransformMakeScale(0.5, 0.5)

        // Viewに追加する
        self.view.addSubview(myScaleDownView)

        // 画像を拡大する

        let myScaleUpView: UIImageView = UIImageView(frame: CGRect(x: 100, y: 120, width: 80, height: 80))

        // UIImageViewに画像を設定する
        myScaleUpView.image = myImage

        // 拡大用(1.5倍)のアフィン行列を生成する。
        myScaleUpView.transform = CGAffineTransformMakeScale(1.5, 1.5)

        // VIewに追加する
        self.view.addSubview(myScaleUpView)

        // 画像を回転する
        let myRotateView:UIImageView = UIImageView(frame: CGRect(x: 100, y: 250, width: 80, height: 80))

        // UIImageViewに画像を設定する
        myRotateView.image = myImage

        // radianで回転角をを指定(30度)する
        let angle:CGFloat = CGFloat((30.0 * M_PI) / 180.0)

        // 回転用のアフィン行列を生成する
        myRotateView.transform = CGAffineTransformMakeRotation(angle)

        // Viewに貼り付ける
        self.view.addSubview(myRotateView)

        // 画像を反転する
        let myReverseView: UIImageView = UIImageView(frame: CGRect(x: 100, y: 360, width: 80, height: 80))

        // 画像を設定する
        myReverseView.image = myImage

        // 反転用のアフィン行列を生成する
        myReverseView.transform = CGAffineTransformScale(myReverseView.transform, -1.0, -1.0)

        self.view.addSubview(myReverseView)
    }

    override func didReceiveMemoryWarning() {
        super.didReceiveMemoryWarning()
        // Dispose of any resources that can be recreated.
    }
}